
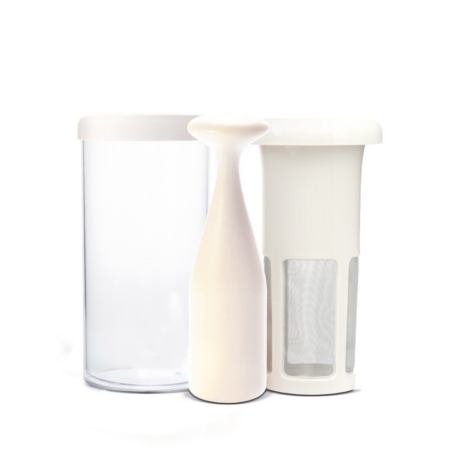
Amaranth seed is a small seed, which a priori, seems difficult to convert into a plant milk. Taking advantage of the versatility that Vegan Milker offers to obtain plant-based milk from any seed, even from smaller ones, we’ve decided to look for a recipe to make homemade amaranth milk.
Nutritional Properties of Amaranth Milk
Amaranth seed is highly valued for its high protein content. It also contains vitamins A , C and minerals such as calcium, iron and phosphorus that strengthen bones and the immune system.
It has a large amount of fiber, so is capable for dragging toxins from the digestive system. However, amaranth fiber is so strong that its excessive use can irritate the digestive system. Therefore, it is recommended to consume amaranth in moderation.
How to make amaranth milk at home
After several trials with amaranth seed, either in flakes or with the raw grain, we have come up with a recipe for each format. Let’s see the quantities and specific process for each type of seed.
Recipe for plant milk with amaranth flakes
This is the simplest method of making amaranth milk, as no soaking is needed, the flake is easily crushed and the process is therefore shorter. The resulting milk is well bound and has a creamy. It’s perfect for use in cooking, either to make a hot chocolate or as a base ingredient for a “bechamel” sauce.
However, unlike oat milk, when amaranth milk is heated in a pan, it does not thicken to the point of becoming a sticky. You have it perfectly illustrated in the video that accompanies this recipe.
Ingredients:
- 150 g amaranth flakes
- 1 liter of water
- a pinch of salt
Preparation:
- Put 1/2 liter of hot water at 50°C in the container and the flakes inside the Vegan Milker filter.
- Fit the filter inside the container, add a little salt. This is the moment to add some sweetener or natural flavoring (optional) ; ginger, cinnamon, cocoa, or whatever you like.
- Blend with a hand blender for 1 minute.
- Add the rest of the water and beat again until the mixture is homogenized. This time 10 seconds will be enough.
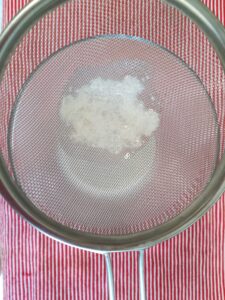
- Remove the filter and press the pulp gently with the mortar.
- Wait for the milk to cool and store it in the fridge. It will last between 3 and 5 days.
We will reserve the pulp to be used as an ingredient in cookies, vegan hamburgers or simply put it in a vegetable cream.
Amaranth milk recipe with raw grain
 If we do not have amaranth flakes, but we have the amaranth raw grain, we can also make amaranth milk. This version is much cheaper than the previous one. The liter of amaranth milk from flakes will cost around 1.5€ while the raw grain version costs 0.40€ per liter. Although we save on costs, the final result is not as optimal. In this version we will see some tiny balls in the upper of the milk (it may be the fiber) that, although they do not hinder the palate, can be unpleasant.
Ingredients:
- 100 grams of raw amaranth grain
- 1 liter of water
- A pinch of salt
Preparation:
- Soak the amaranth grains for 8 hours and after this time discard the soaking water.
- Place the amaranth with the salt in the filter and put it in the Vegan Milker container.
- Add a small glass of hot water (150-200 ml) at 70ºC, enough water to cover the amaranth grains and to be able to beat with the mixer.
- You will find that it is a small and hard seed, difficult to grind. To minimize the action space created inside the filter and better trap the seed with the blender blades, we propouse to use the powerest position of the hand blender and very little water.
- Do not despair. After 2 minutes crushing the seed, we will see that the water turns milky. Now we have the essence for our amaranth milk.
- Add the rest of the water up to one liter and continue beating for 10 seconds to homogenize the mixture.
- Strain the milk with the mortar.
- Transfer the milk to a saucepan and cook it for 10 minutes over low heat.
- Stir the milk so that it does not stick and remove the foam that forms on the top.
- Wait for the milk to cool and store it in the fridge. It will last between 3 and 5 days.
As with the flaked version, the pulp from the raw grain can be used for cooking. The pulp is added in the last 5 minutes of cooking of any stew, pure or cream.
Once you know how to make both versions, we definitely recommend the flaked version, as it is more simply to make and offers a tastier and creamier milk as a result. However, it seems important to us to offer the different options, so that you can experiment and everyone can decide their favorite.
Surely there are more alternatives out there. We continue to investigate.


0 Comments